MongoDB GUI: Using FerretDB with NoSQLBooster

Since the release of FerretDB 1.0, we've been exploring and showcasing how FerretDB works with real-world applications, especially with MongoDB GUI tools – and NoSQLBooster is one of them.
NoSQLBooster is a cross-platform MongoDB GUI that you can use with FerretDB.
By using FerretDB, an open source MongoDB alternative, with NoSQLBooster, users can have access to NoSQLBooster's built-in features, including Query Code Generator, SQL Query functionality, Comprehensive Server Monitoring tools, Intellisense, among others.
Just in case you missed it, here is our previous blog post where we covered another MongoDB GUI application with FerretDB: Using FerretDB with Studio 3T.
For this particular blog post, we will explore how to use FerretDB with NoSQLBooster, including setting it up, querying it, running aggregation operations, getting performance statistics, and more.
Installation and Setup
FerretDB
FerretDB is a truly open-source document database replacement to MongoDB that provides you with familiar query language and commands that you're already used to. The default backend for FerretDB is PostgreSQL, an open-source, reliable, and popular database supported by a large community of providers and DBAs, making it easy to avoid vendor lock-in. By the way, we've just released beta support for SQLite backend, and you can read more about this here.
You can run FerretDB on two cloud providers – Scaleway and Civo Marketplace.
To run your own instance of FerretDB or try it locally, follow the FerretDB quickstart instruction or the installation guide here to set it up and running.
In this tutorial, we'll be using the Docker setup, which requires having Docker installed if you don't have it.
With Docker installed, we set up our docker-compose YAML file with the following configurations:
services:
  postgres:
    image: postgres
    environment:
      - POSTGRES_USER=username
      - POSTGRES_PASSWORD=password
      - POSTGRES_DB=ferretdb
    volumes:
      - ./data:/var/lib/postgresql/data
  ferretdb:
    image: ghcr.io/ferretdb/ferretdb
    restart: on-failure
    ports:
      - 27017:27017
    environment:
      - FERRETDB_POSTGRESQL_URL=postgres://postgres:5432/ferretdb
networks:
  default:
    name: ferretdb
Once that is set up, run docker compose up -d in the terminal to start the services.
Ensure to update the username and password.
NoSQLBooster
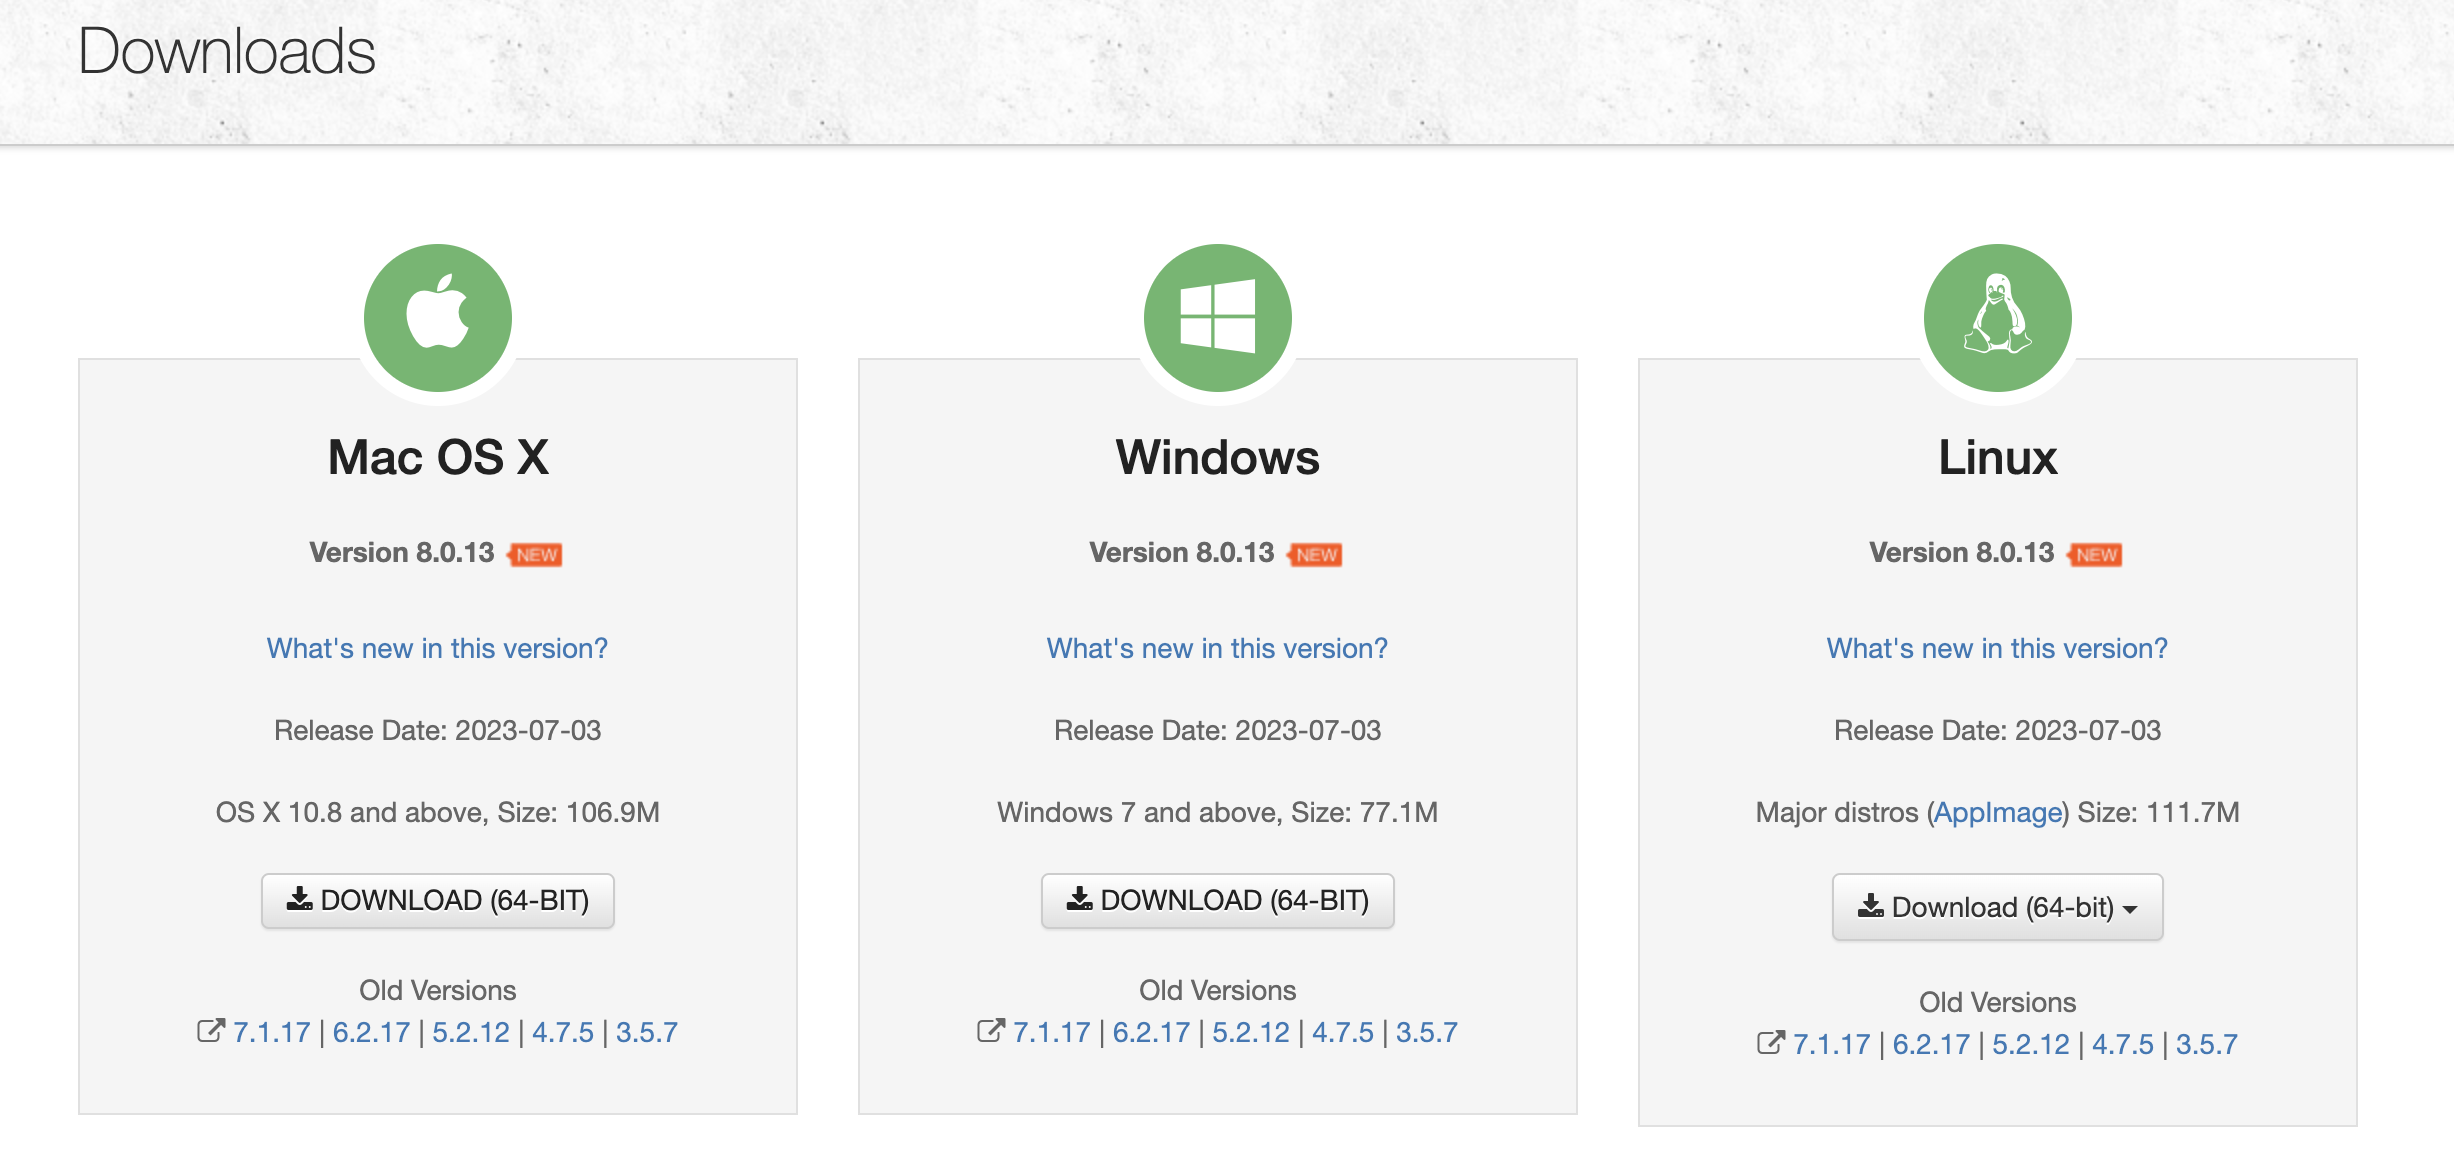
For NoSQLBooster, download the NoSQLBooster setup from their website.
Connecting FerretDB with NoSQLBooster
At this point, you should have NoSQLBooster installed and your FerretDB instance running.
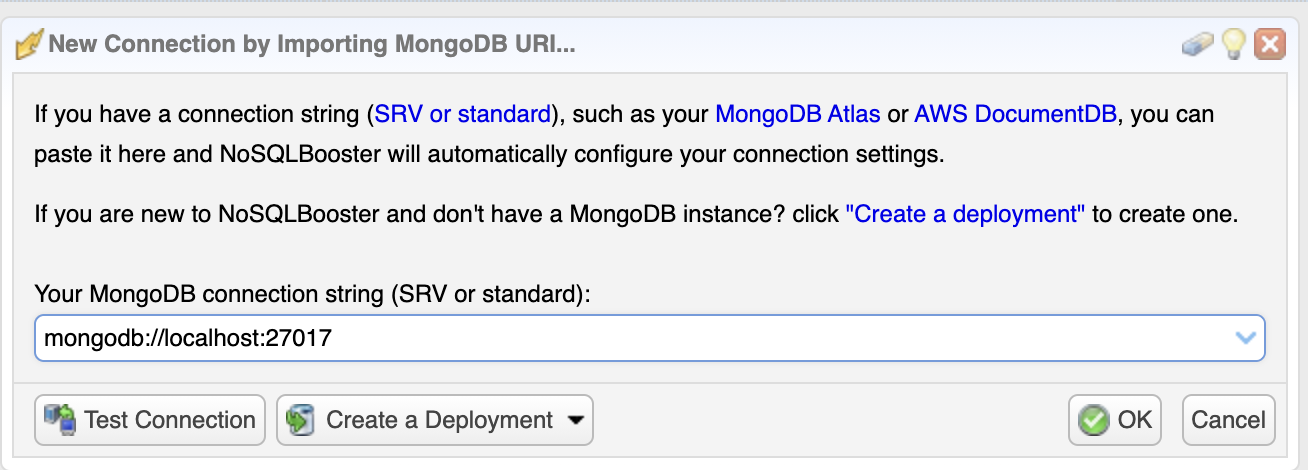
The next thing to do: connect to FerretDB from NoSQLBooster. To do this, open the NoSQLBooster application, and click "Connect" to open the Connections window, and then select "New Connection".
Here, we specify the connection URI string mongodb://127.0.0.1:27017/ and click "OK" to connect with FerretDB at port 27017.
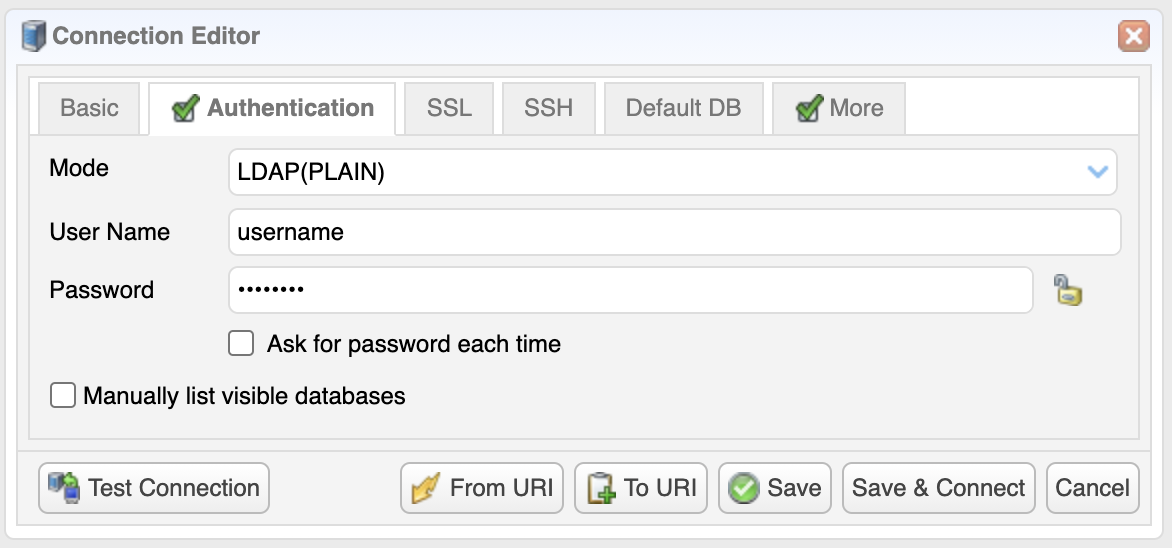
Also, you need to specify the username and password to authenticate FerretDB. Go to the "Authentication" tab on the "Connection Editor" and select LDAP (PLAIN). At the moment, FerretDB only supports PLAIN authentication.
Add Demo Data
Once your connection is set up, you can see all the available databases in the FerretDB instance. However, in this tutorial, we'll add new demo data to showcase some of the useful features of FerretDB you can access through NoSQLBooster.
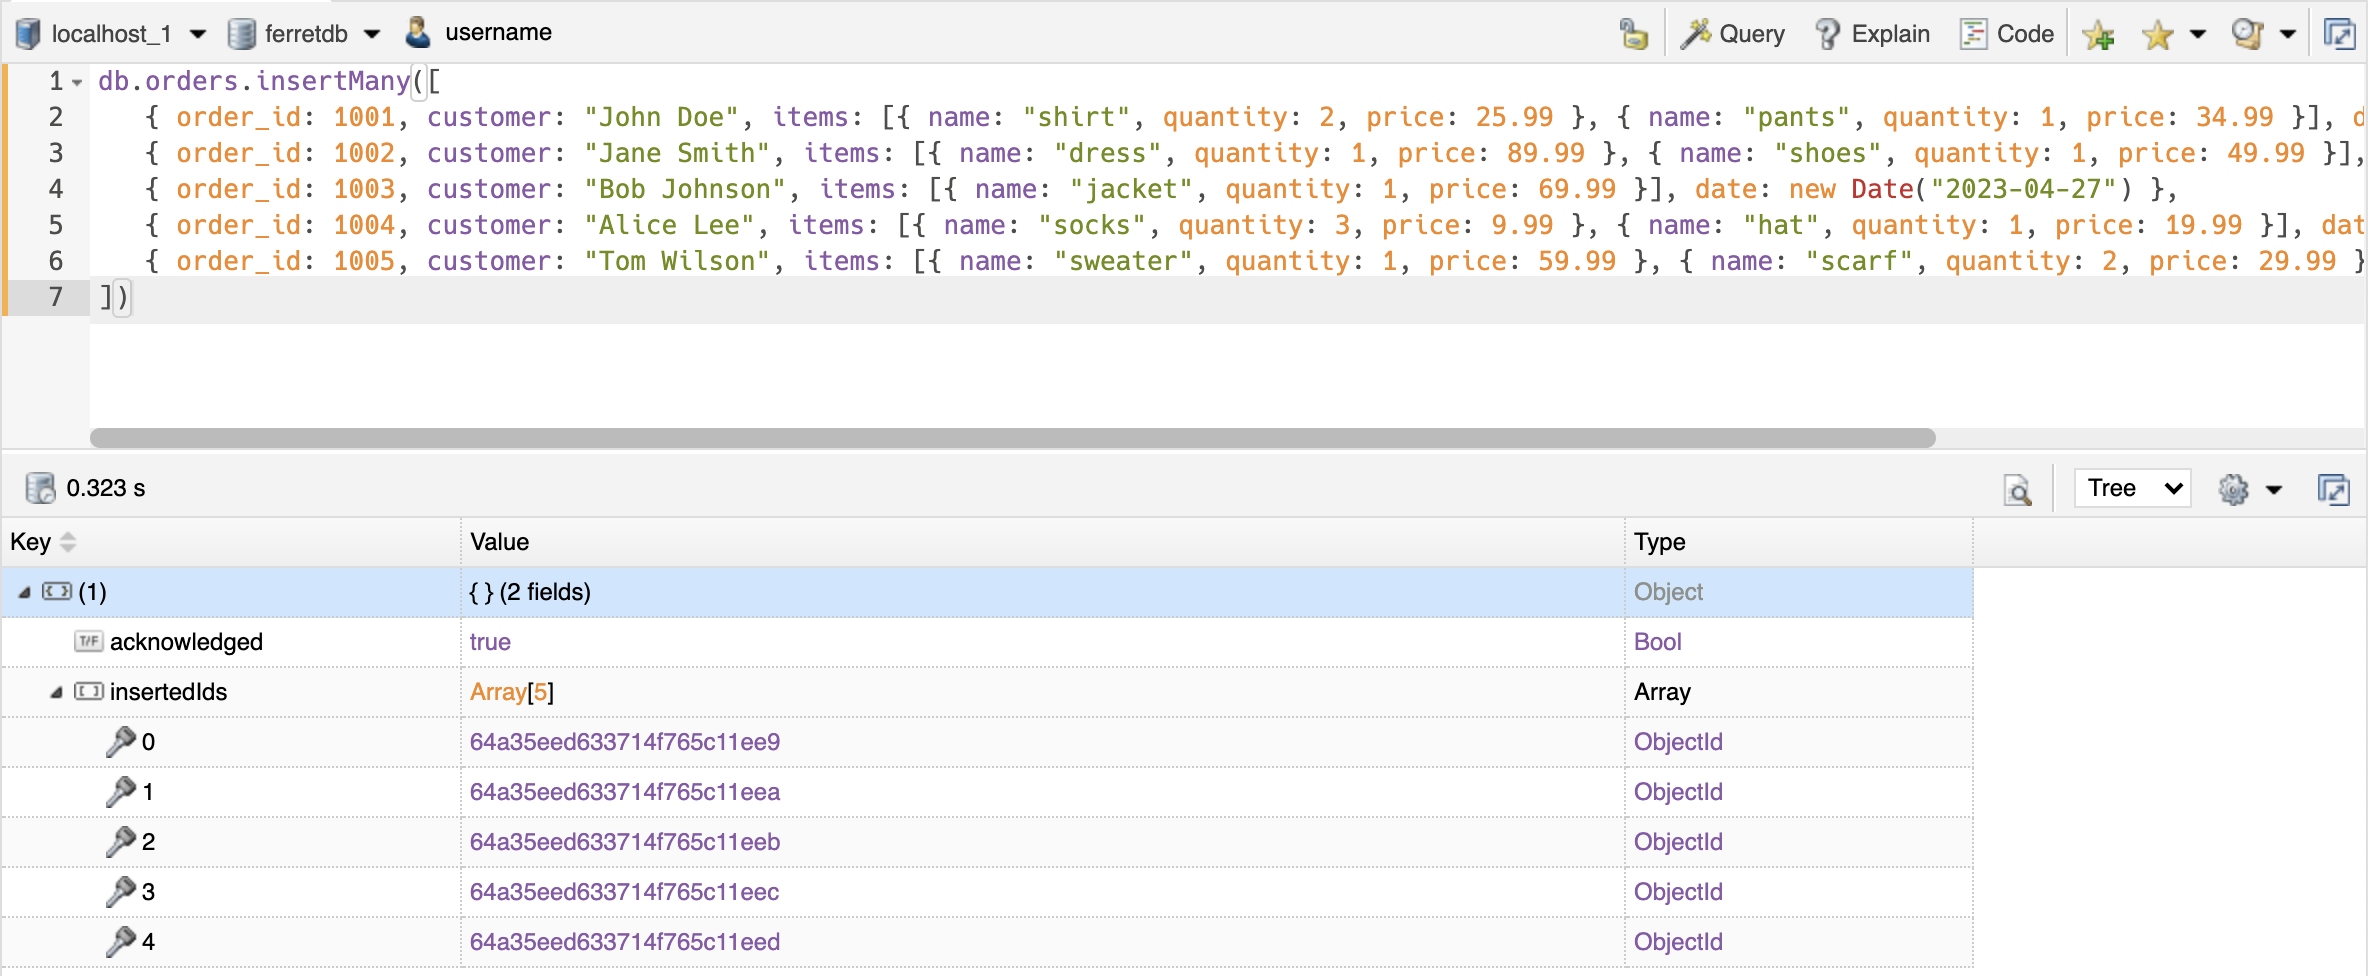
Please insert this demo data into FerretDB to set up the orders collection through NoSQLBooster.
Click on the tab with the shell icon to open the MongoDB shell in NoSQLBooster.

db.orders.insertMany([
  {
    order_id: 1001,
    customer: 'John Doe',
    items: [
      { name: 'shirt', quantity: 2, price: 25.99 },
      { name: 'pants', quantity: 1, price: 34.99 }
    ],
    date: new Date('2023-04-25')
  },
  {
    order_id: 1002,
    customer: 'Jane Smith',
    items: [
      { name: 'dress', quantity: 1, price: 89.99 },
      { name: 'shoes', quantity: 1, price: 49.99 }
    ],
    date: new Date('2023-04-26')
  },
  {
    order_id: 1003,
    customer: 'Bob Johnson',
    items: [{ name: 'jacket', quantity: 1, price: 69.99 }],
    date: new Date('2023-04-27')
  },
  {
    order_id: 1004,
    customer: 'Alice Lee',
    items: [
      { name: 'socks', quantity: 3, price: 9.99 },
      { name: 'hat', quantity: 1, price: 19.99 }
    ],
    date: new Date('2023-04-28')
  },
  {
    order_id: 1005,
    customer: 'Tom Wilson',
    items: [
      { name: 'sweater', quantity: 1, price: 59.99 },
      { name: 'scarf', quantity: 2, price: 29.99 }
    ],
    date: new Date('2023-04-29')
  }
])
Testing Basic FerretDB Operations in NoSQLBooster
Once you've inserted the documents, navigate to the orders collection in NoSQLBooster (you may need to click "Refresh" for the additions to take effect in NoSQLBooster).
Double-click on the collection to display and read the data from the collection.
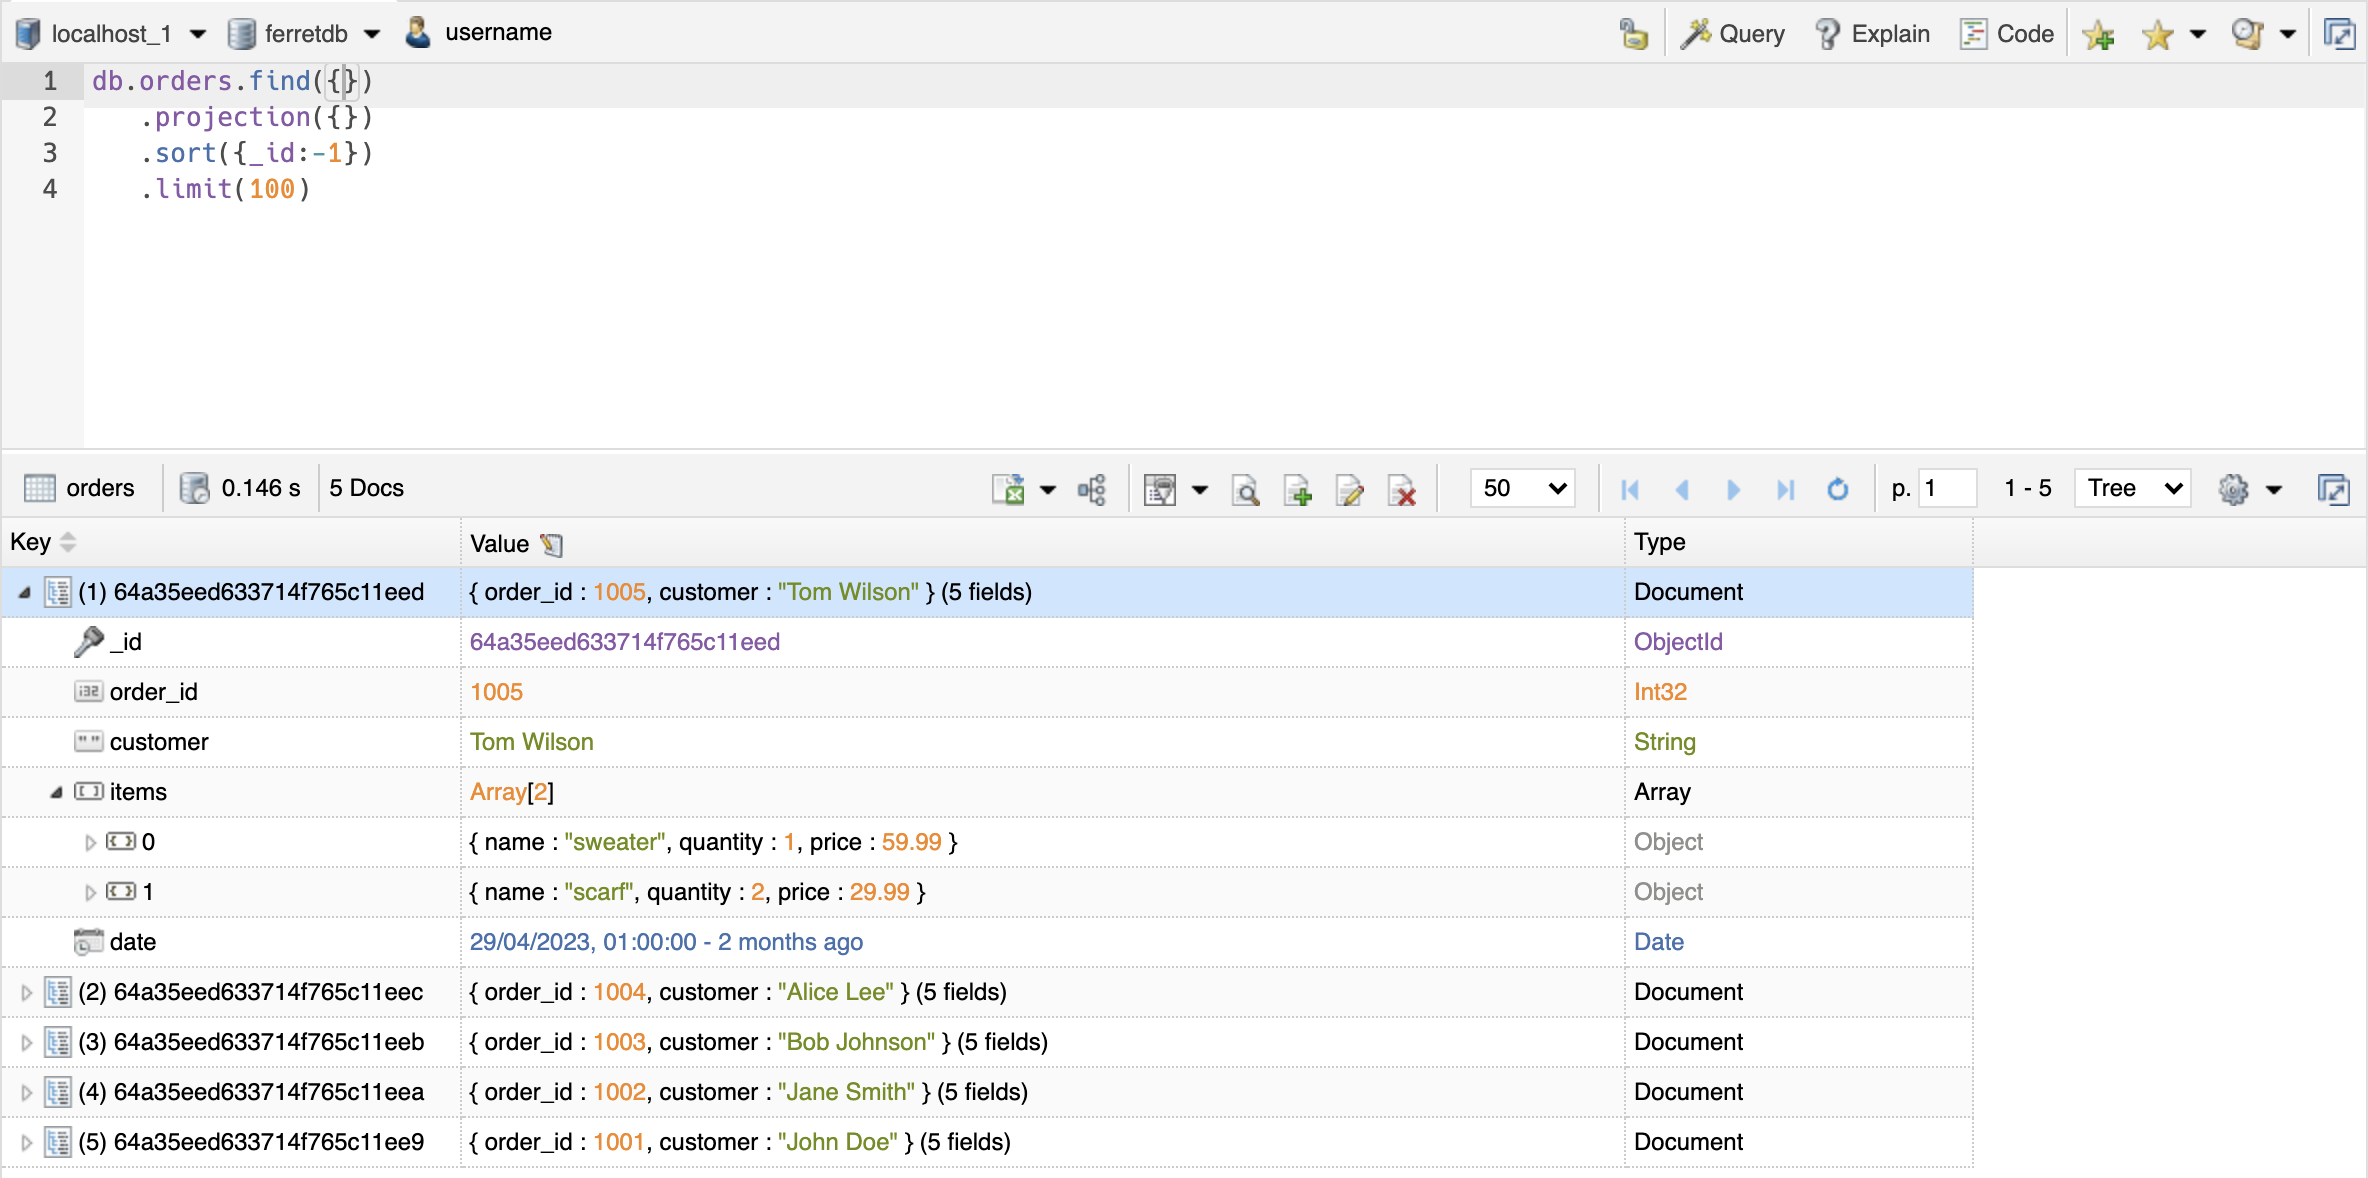
Let's run other operations on the database to see what else we can do with the FerretDB in NoSQLBooster.
Nested document query using Query Builder
Using the NoSQLBooster Query Builder, let's find the documents in the collection where the sub-document item.name is shoes.
To do this, we'll be using the Query Builder in NoSQLBooster. You can find this by clicking the "Query" tab.

Once the Query Builder is open, insert the query terms, then set items.name equals shoes.
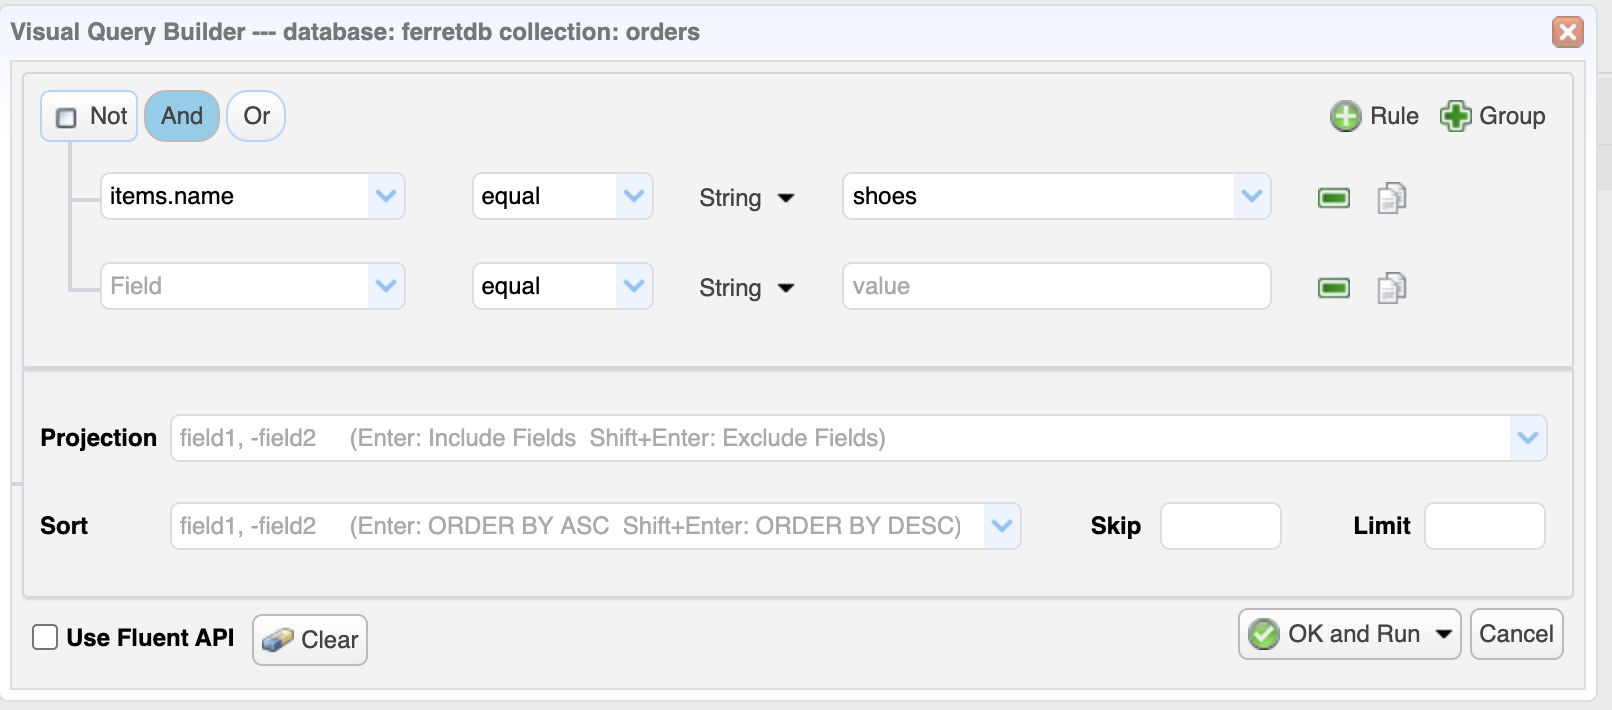
Click "OK and Run" to execute the query.

Use Aggregate Pipeline Stage
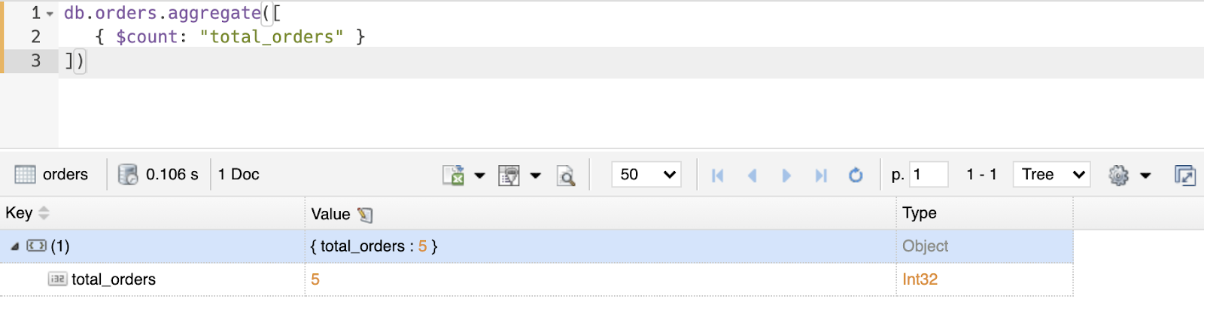
You can leverage the MongoDB shell in NoSQLBooster to run any command you want.
In the next example, we're going to execute a command that'll return a document with a field named total_orders containing the number of documents in the orders collection.
db.orders.aggregate([{ $count: 'total_orders' }])
Let's also perform some aggregation operations to calculate the total value of all items purchased by each customer. Run the following command to do this:
db.orders.aggregate([
  { $unwind: '$items' },
  { $group: { _id: '$_id', total_value: { $sum: '$items.price' } } }
])
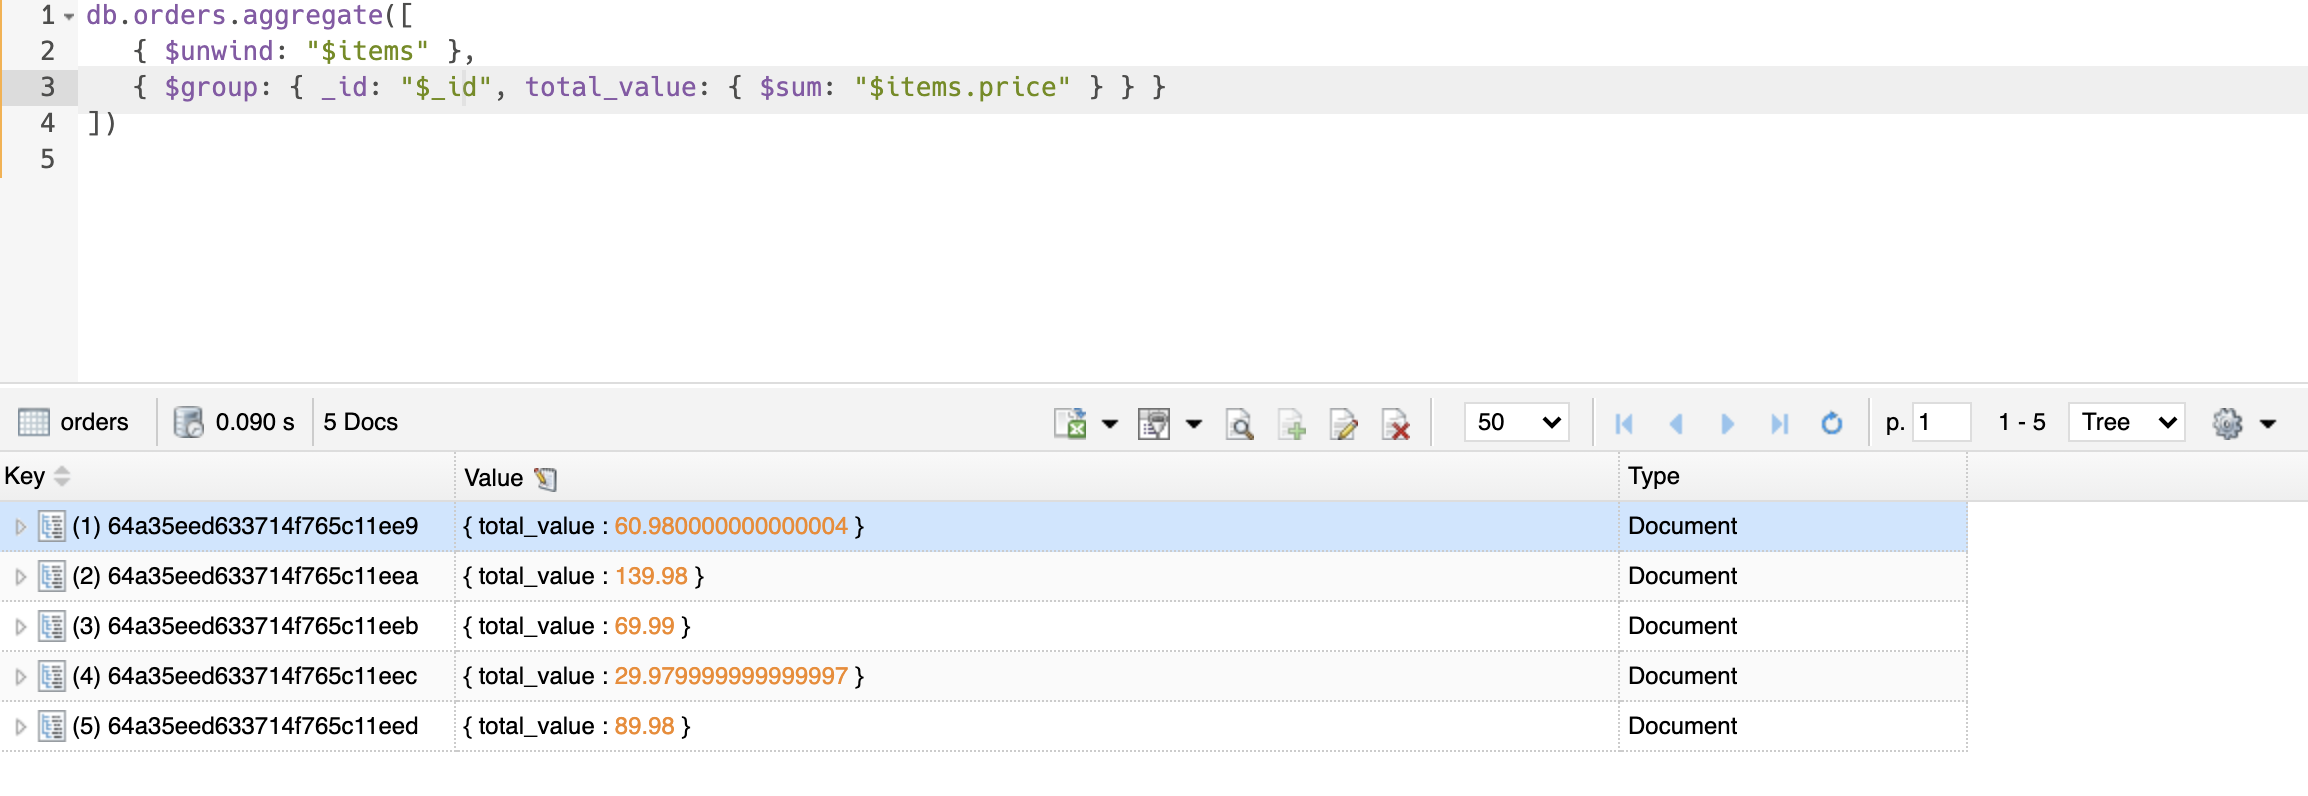
FerretDB enables users to carry out similar intricate data transformations as you'd find in MongoDB.
In addition to the aggregation commands like aggregate, count, and distinct, FerretDB also supports various pipeline stages, such as $count, $group, $limit, $match, $out, $skip, $sort, and $unwind.
For a comprehensive list of FerretDB's supported commands, refer to this page.
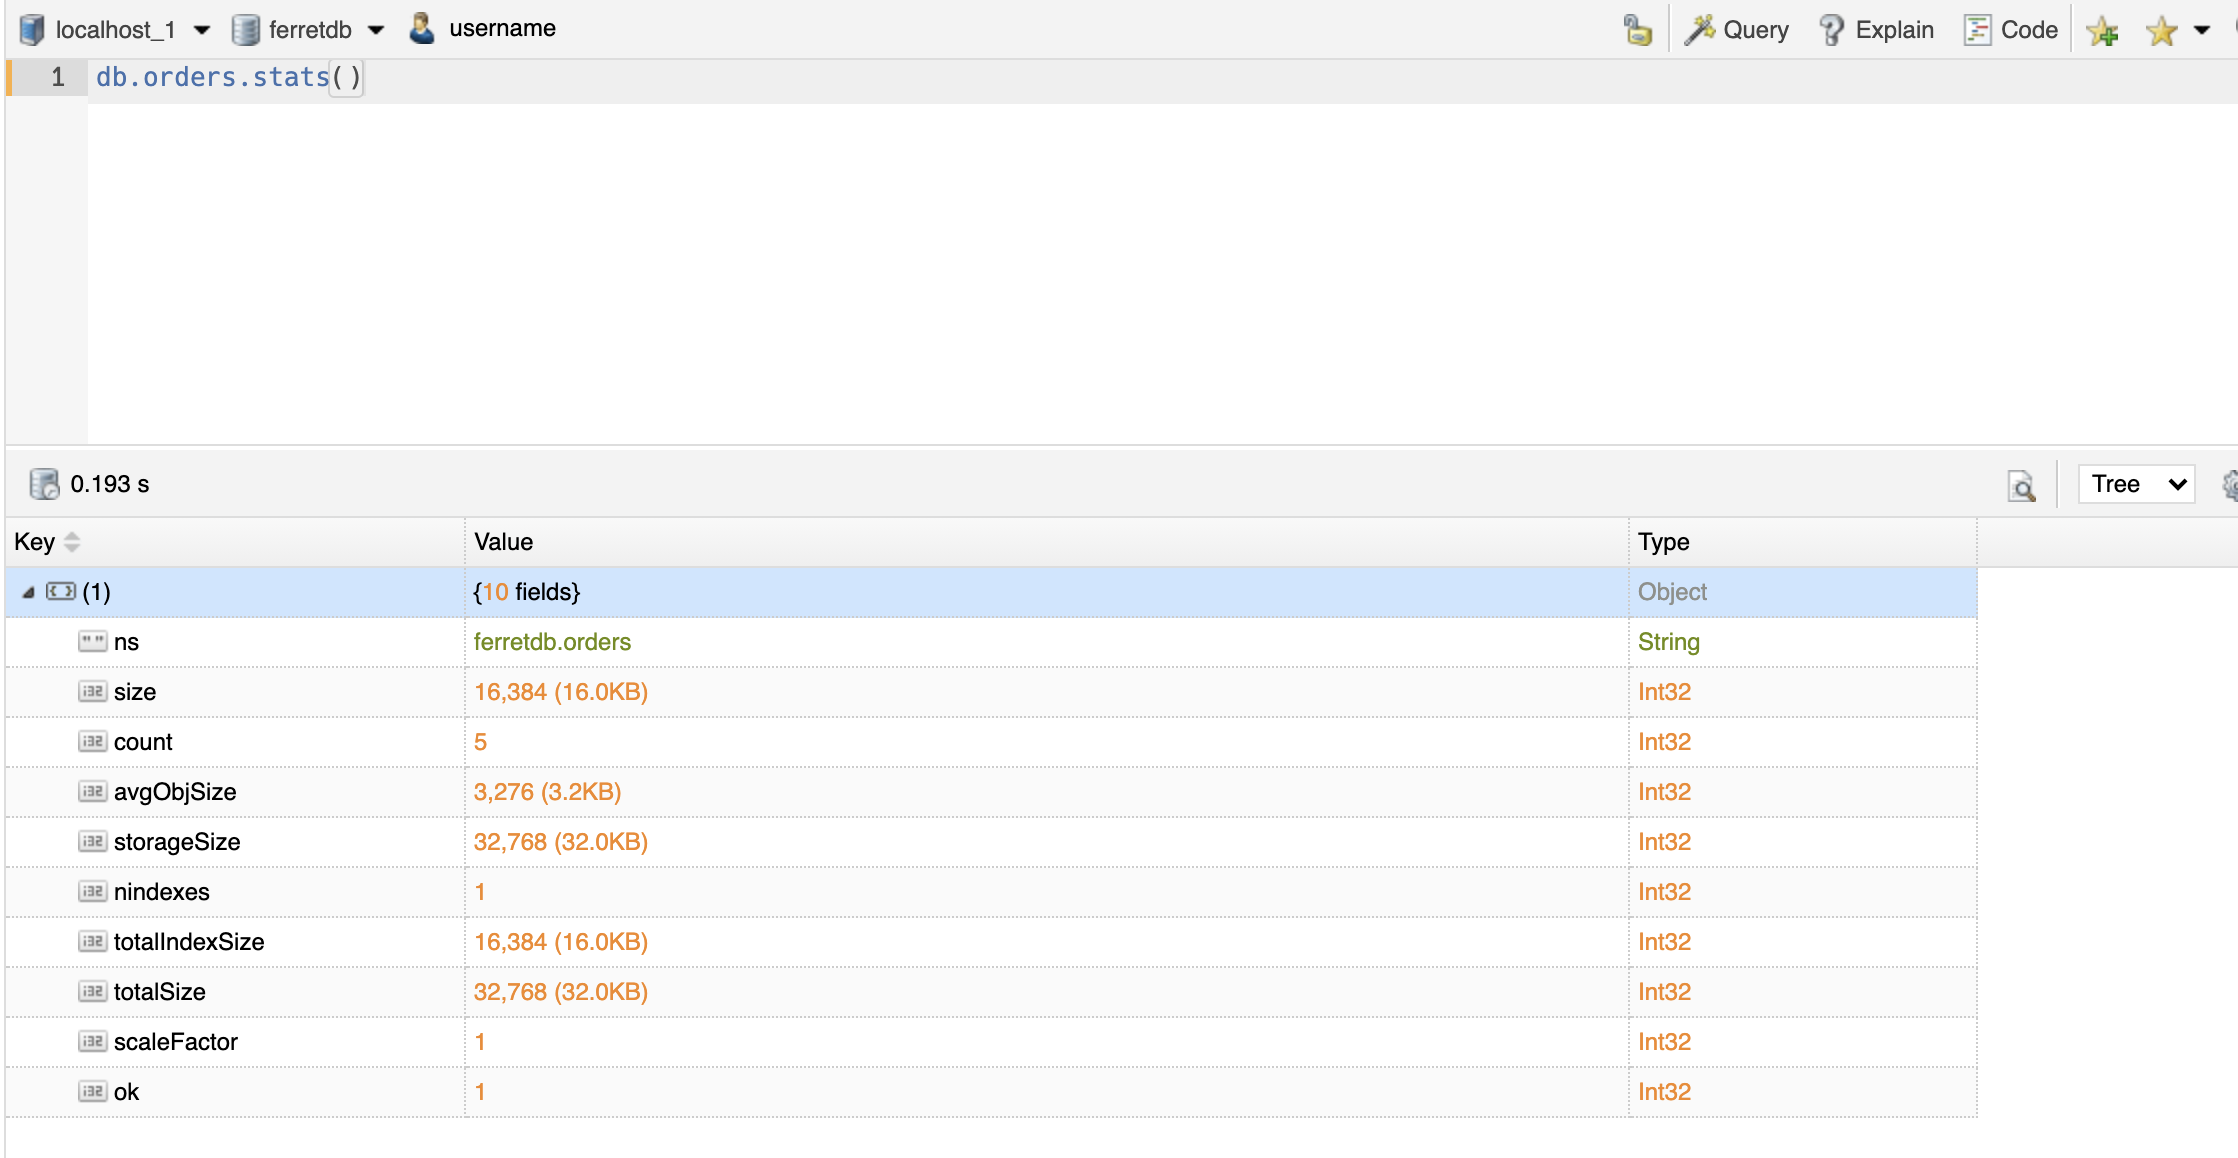
Monitoring and Performance
You can also monitor and analyze your FerretDB environment right from the NoSQLBooster interface.
For example, you can collect statistics for 'orders' collection using the following command.
db.orders.stats()
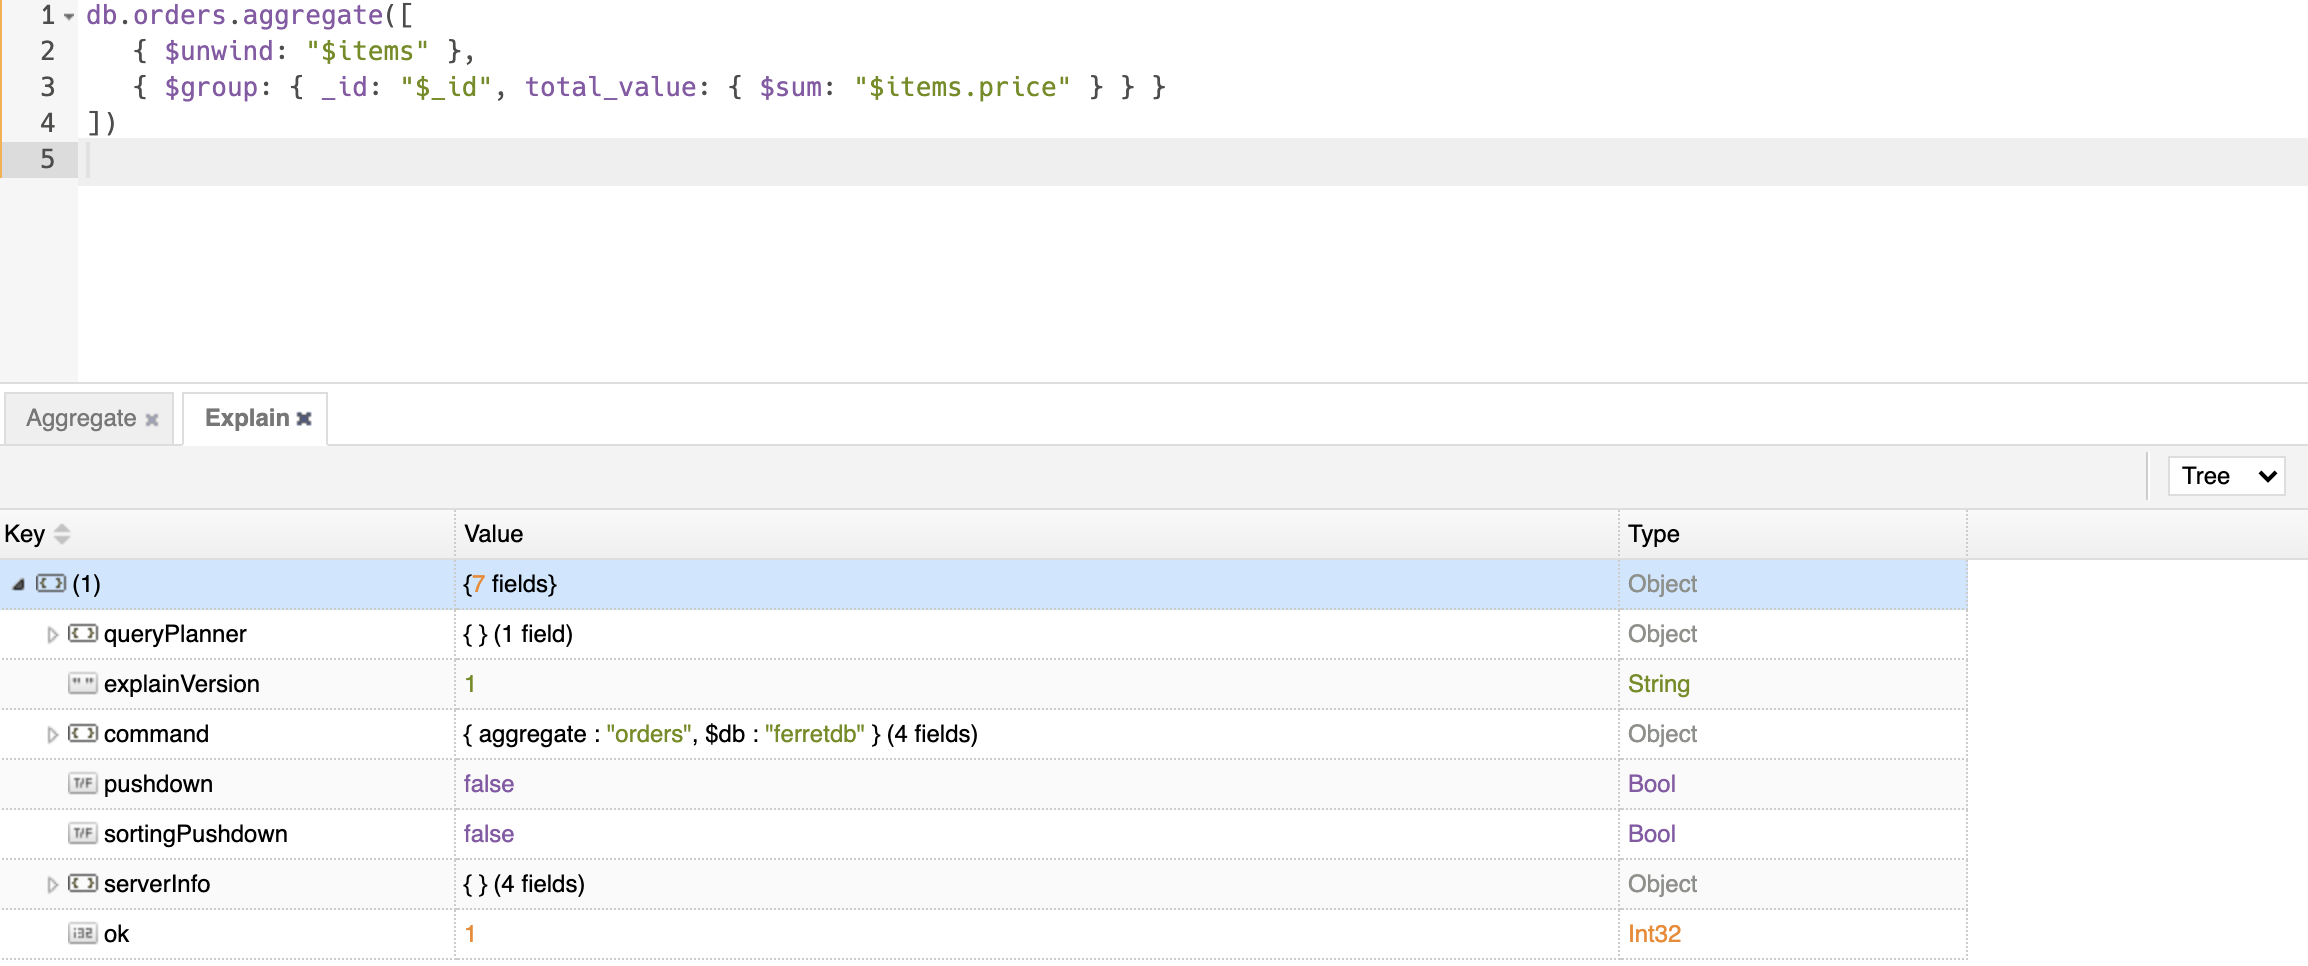
In addition to this, you can also leverage NoSQLBooster's Visual Explain tool to transform the output of the explain command into a tree-like view.
Quickstart Guide for Using ferretDB with NoSQLBooster
Beyond the examples shown in this article, you can explore other features of FerretDB using NoSQLBooster and other MongoDB GUI applications. With every new release, FerretDB builds on its list of new features (see them here) and compatible applications.
If you would like to contribute or are interested in learning more about FerretDB, please reach out to us here.